Radio Removal
![]()
|
Radio Removal
|
|
|
NOTE DISCLAIMER: I will not accept liability for anyone's removal attempts. This information is posted for informational purposes only. Don't try this without proper training. Any removal attempts are at your own risk. I will not be financially liable to any damage or expenses you may incur in trying to remove your radio.
Here's some pictures and comments on the radio removal procedure.... If your looking to remove the radio from a Nissan Quest,
please take a look at: For the Ford owners, read on...
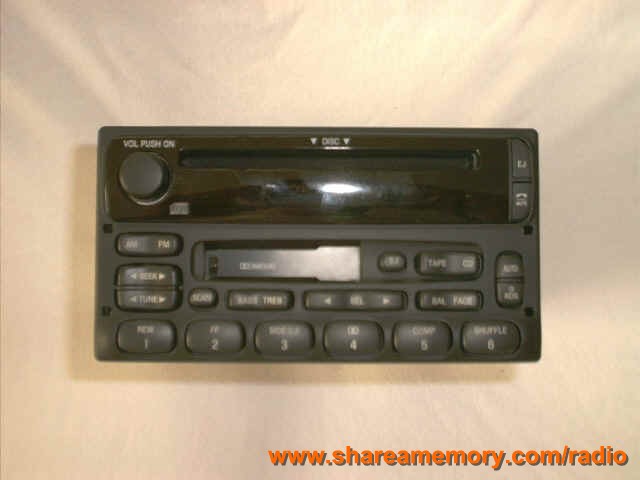
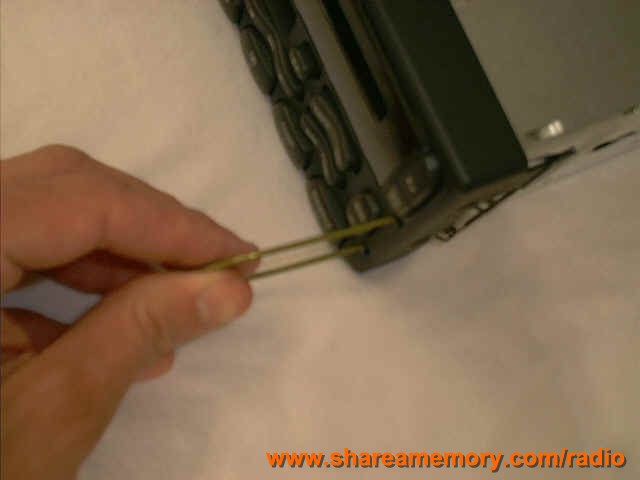
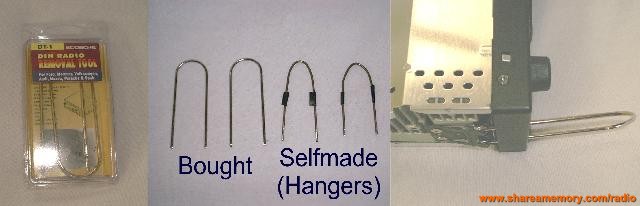
Figure 6-8 - Insert the clothes hanger tools (one tool in on each side of the radio) in the holes on the front faceplate. It works best by angling the hangers toward the center of the radio. Do not insert more than 1 1/4 inches. Once inserted, apply a pressure away from the center of the radio (push towards the outsides of the radio) and then begin to pull the radio out of the dash...two hands are required for this and three would be better in some cases).
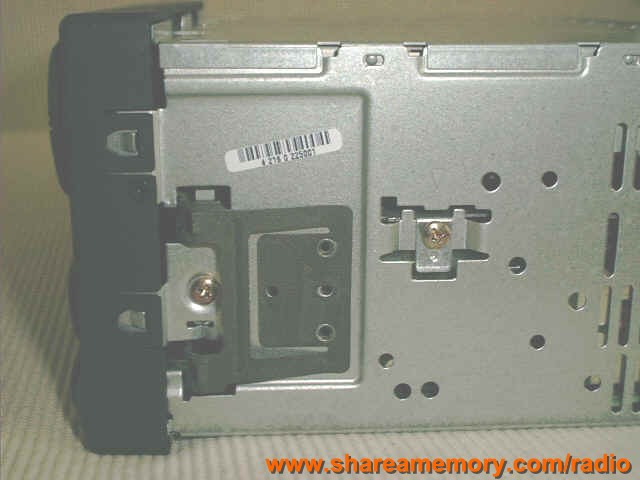
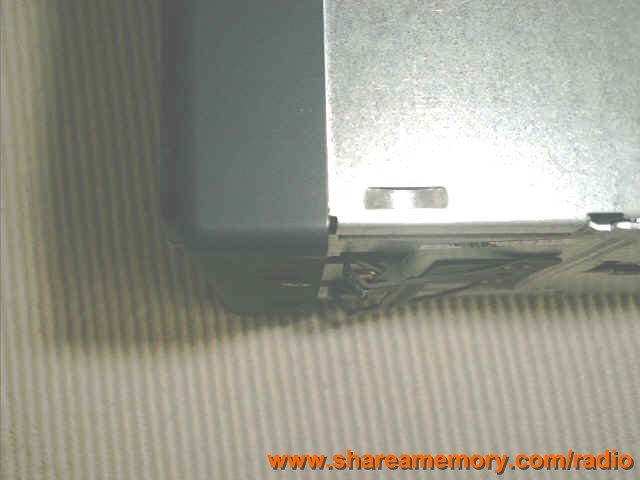
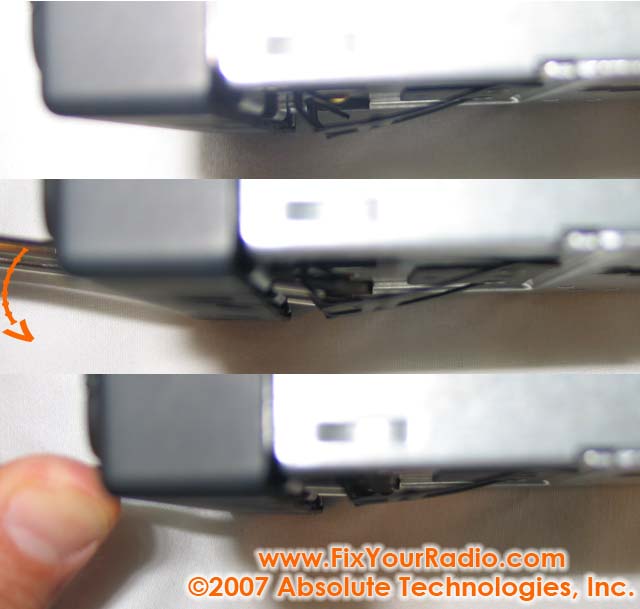
Figure 8.1 shows a side view of the radio with the
start of inserting the DIN tools...the DIN tools are not inserted all the
way, just starting to penetrate the insertion holes (not engaged with the
locking mechanism yet).
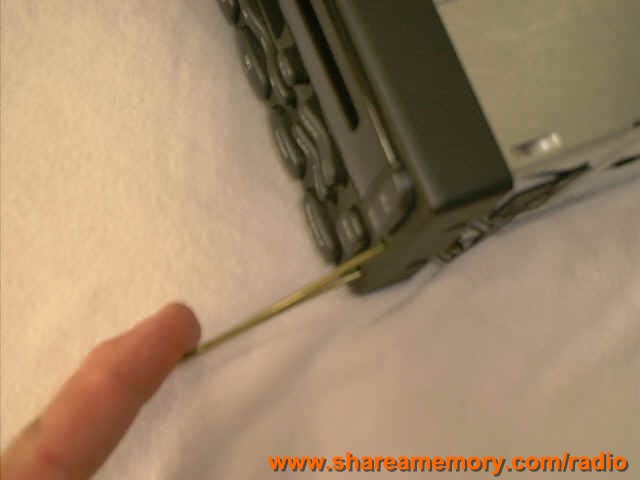
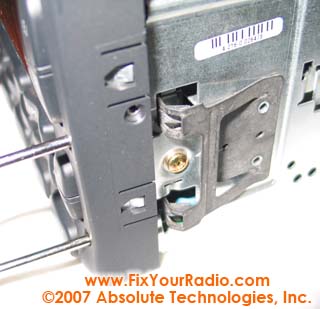
1. Looking down on the radio onto the locking tab. 2. DIN tool inserted (about 1 1/4" into the insertion hole). The orange arrow shows how to pivot the U shaped DIN tools to pivot about the insertion hole to move the locking tabs along side of the radio in towards the body of the radio, releasing the locking mechanism from holding the radio in the hole of the dash. 3. DIN tool with pressure applied, moving the locking tabs in towards the body of the radio chassis. RADIO REMOVAL TOOL addendum:
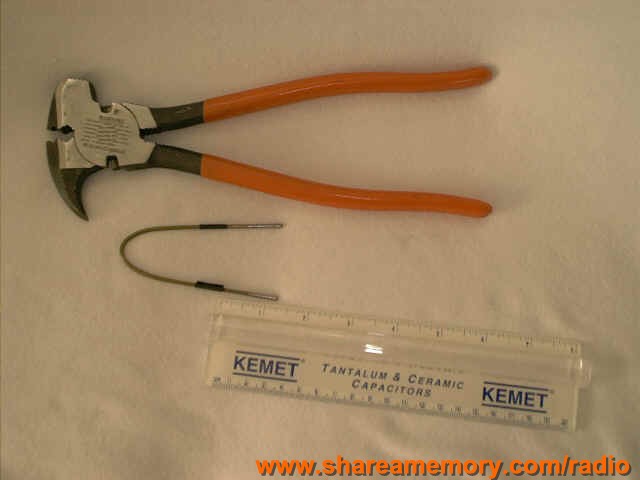
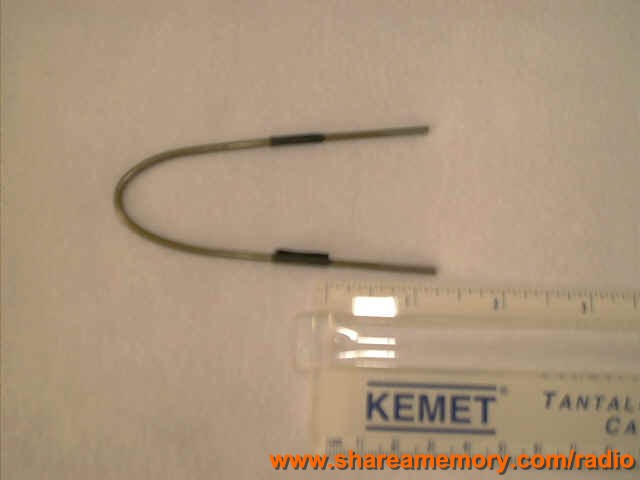
Well, I purchased the set shown above at Wal-Mart for about $3.97. They are nicely formed compared to my self-made clothes hanger ones. When properly used, these DIN connectors can be useful in getting the radio out. If you opt for the DIN removal tools, you simply insert them into the holes of the radio until you feel a firm click (should be about 1 1'4" into the holes). Once inserted, you apply the outward pressure and pull at the same time to get the radio to slide out. It's not too easy either way, homemade tools or DIN removal tools, to get these radios to slide out of their mounting. Some may say the DIN removal tool is easier, overall though, three hands still work best (see comments above).
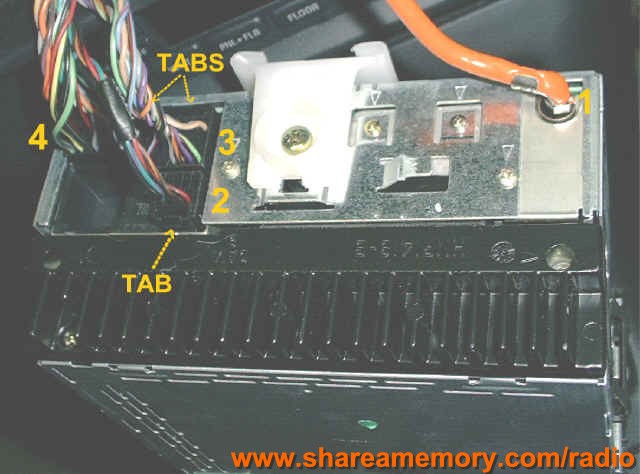
Figure 8B shows the three connectors and the antennae coax connection that needs to be removed. NOTE: You may only have TWO Connectors if your vehicle doesn't have a powered subwoofer...so don't be alarmed of you only have two plus the antennae. The order in which I remove these are numbered...first the antennae coax is disconnected, followed by the three connectors (installation is the reverse process...4, 3,2,1). Note that the connectors have tabs on them which need to be depressed to be able to pull the connector out of the radio. You should now have your radio out of the dash...you can move on to the Fix!
If you are just using this site for the information to remove your radio and have found this information useful, then please consider giving a contribution to the effort and the time taken from my kids to get these directions together (and to help defray the hosting fees incurred to keep this information posted). PayPal makes it easy to contribute $3 or whatever you feel is appropriate: Thanks! D. Harrison
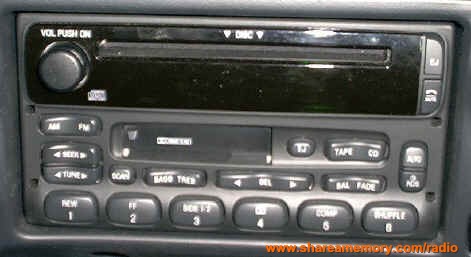
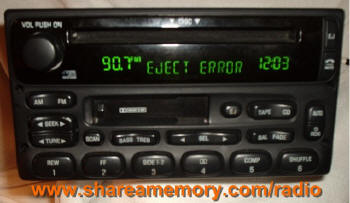
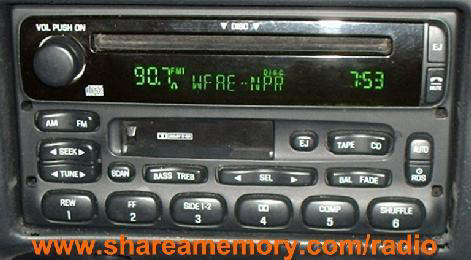
HERE ARE THE AVAILABLE FIXES FOR THE RADIO SHOWN ABOVE IN FIGURE 3 (and those pictured below):
Click one of the above Icons to Purchase the Radio Repair Access
CD EJECT ERROR
ACCESS (Ford/Nissan)
Click one of the above Icons to Purchase the CD Eject Error Access
COMBO REPAIR - DISPLAY/VOLUME
CONTROL/CD EJECT ERROR ACCESS
Click one of the above Icons to Purchase the
"Save My Sanity" Repair Program The Save My Sanity REPAIR PROGRAM has you ship your power supply board in for the repair and modifications to eliminate the blank display problem. You send your power supply board in for the repairs and all the modifications to your board to repair you board, even if you have tried the repairs yourself. The cost is $89.99. If I cannot fix your board, it will be returned without a charge and your payment will be returned. Upon receipt of payment, I will send you specific, step by step picture-detailed instructions on how to remove the power board from the radio...it's not too hard. If you can get the radio out of the dash (the harder part of the task...which directions are provided free on this web site...click here) , you can get the power supply board out of the radio. If once you receive the instructions you are unable to get the radio out or you think it's too much trouble, let me know and I can refund your payment. What this new program will do for you is: *If the board cannot be fixed, it will
be returned without cost to you. Click the above Icon to Purchase the
"Save My Sanity" Repair Program
"Save My Sanity" Repair Program
|
|